SUBDERMAL IMPLANTS
テーマTHEME
相談するCONSULT
製品PRODUCTS
ガイドGUIDE
会社情報COMPANY
ご利用の流れGET STARTED

注文、バウチャー、インストール。日本での流れOrder, voucher, physician. The path in Japan

選ぶ。振り込む。バウチャーを受け取る。予約する。インストールを受ける。全体はこの5つだけです。ご注文とインストールをつなぐのが、インストールバウチャーです。Choose the implant, pay by bank transfer, receive your installation voucher on LINE, book with a partner physician yourself, and go with your ID. Five steps. The voucher is what connects your order to the physician.

お支払いPAYMENT 銀行振込のみBank transfer only1回のご注文PER ORDER マイクロチップインプラント1本One implant年齢AGE 18歳未満は親権者の同意が必要Under 18: guardian's consent required

5つのステップTHE FIVE STEPS

01

インプラントを選ぶChoose the implant

製品ページを読み比べて、やりたいことに合うマイクロチップインプラントを決めます。Read the product pages, compare, and decide what you actually want.

  • 分からない点は公式LINEでご相談ください。Anything unclear, ask on the official LINE account.
  • ご不明な点がなければ、そのままお進みいただけます。Nothing unclear, you can order straight away.
02

公式LINEで注文、銀行振込Order on LINE, pay by bank transfer

表示価格は本体価格(税込)です。The listed price is the implant itself, including tax.

  • お支払いは銀行振込のみで、クレジットカードや電子マネーは使えません。Payment is by bank transfer only, no card, no e-money.
  • 入金確認後、本体は担当の提携医師のもとへ直送され、お客様の手元には届きません。Once payment is confirmed, the implant ships straight to your partner physician, never to you.
03

バウチャーが届くYour voucher arrives on LINE

公式LINEに発行リンクが届きます。リンクからインストールバウチャー(QRコード)を発行できます。A link arrives on the official LINE account, and it issues your installation voucher, a QR code.

  • バウチャーページで、インストールを受ける場所の住所と、提携医師への連絡先を確認できます。The voucher page shows where to go and how to contact your partner physician.
  • 当日の流れも同じページにまとまっています。It also walks through what happens on the day.
04

提携医師に予約するBook with your physician yourself

バウチャーに記載の連絡先へ、ご自身でご予約ください。Contact your partner physician using the details on the voucher and pick a date that suits you.

  • 製品はお客様ではなく提携医師のもとへ発送します。これまでの実際では、ご注文から2〜3日ほどで届いていますので、日程は数日の余裕をみてお選びください。発送後の輸送は日本郵便の運行によるため、これは実績であってお届けの約束ではありません。Your implant is dispatched to your partner physician, not to you. In practice it has been arriving there about two to three days after an order, so please allow a few days when choosing your date. The journey after we hand the parcel over is Japan Post's, so this is what we have seen rather than a delivery commitment.
  • 予約状況はVivoKey Japanでは確認できないため、変更やキャンセルも提携医師へ直接ご連絡ください。VivoKey Japan cannot see the booking, so changes and cancellations go to your partner physician directly.
05

当日はバウチャーと身分証を持参Go with your voucher and ID

当日はQRコードと公的身分証を提示します。Show the QR code and a government ID.

  • 提携医師がご注文内容を確認し、手順をご説明したうえでインストールします。Your partner physician confirms your order, walks you through the procedure, and installs the implant.
  • アフターケアの説明を受けたら、その場でインストール料をお支払いください。The aftercare is explained, and the installation fee is settled there.

注文のきまりORDER RULES

注文前に確認BEFORE YOU ORDER →

ご注文は公式LINEからOrders start on official LINE

ご希望のインプラントをお知らせください。そのやり取りでご希望のエリアや状況を伺い、対応できる提携医師をご案内します。Tell us which implant you want. In that conversation we ask about your area and situation and match you with a partner physician.

本体は提携医師のもとへ直送The implant ships to your physician

お客様の手元には届きません。当日、提携医師がそのままインストールに使用します。Never to you. Your physician opens it on the day and uses it for your installation.

インストール料は提携医師へThe installation fee goes to your physician

インストール料は提携医師が設定し、当日、提携医師へ直接お支払いいただきます。提携医師によってはインストール前のお支払いになります。The installation fee is set by your partner physician and paid to them directly on the day. Some partner physicians take it before the procedure.

予約はご自身でYou book with your physician yourself

バウチャーが届いたら、記載の連絡先へご予約ください。予約状況はVivoKey Japanでは確認できないため、日程の変更や取消も提携医師へ直接ご連絡ください。When your voucher arrives, use the contact on it to book. VivoKey Japan cannot see the booking, so any later change or cancellation goes to your partner physician directly.

インストールバウチャーTHE VOUCHER

インストールを受ける場所と連絡先Where to go, and the contact

事前のご相談で決まった提携医師の情報。予約に必要なことはここにそろっています。This is the partner physician matched to you during the pre-order conversation, with everything you need to book.

当日の流れと注意事項The day-of flow and precautions

当日何が起こるかを、順を追って確認できます。前後の注意点も同じページにまとまっています。It walks through what happens on the day, in order, and what to watch for before and after.

推奨アプリへのリンクA link to the recommended app

ご購入いただいたインプラントに対応したアプリへのリンク。当日からすぐ使えます。A link to the app that matches the implant you ordered, so you are ready to use it on the day.

QRコードは当日に使うThe QR code is for the day itself

インストール当日に提示します。読み取るとログイン画面が出ますが、提携医師の側が予約内容とインプラントの種類を確認するためのもので、お客様の追加登録は不要です。You show it on the day. Scanning it opens a login page meant for your partner physician, which confirms your booking and implant type; you do not need to register anything.

発行リンクは公式LINEでSent by official LINE

インストールバウチャーの発行リンクは、お客様のご入金を確認後、24時間以内に公式LINEでお客様へお送りします。届かない場合は公式LINEへご連絡ください。ページのURLとQRコードは大切に保管してください。The installation voucher link is sent by official LINE within 24 hours of payment confirmation. If it has not reached you, message us there. Keep the page URL and the QR code safe.

連絡先はバウチャーでお知らせContact details only through the voucher

提携医師は有効なバウチャーをお持ちの方だけにインストールを行うため、インストールを受ける場所や連絡先はバウチャー発行後にご案内します。バウチャーが発行される前に、提携医師へ直接お問い合わせいただくことはご遠慮ください。Partner physicians install only for customers holding a valid voucher, so where to go and how to reach them are shared after the voucher is issued. Please do not contact a partner physician before that.

実際の画面What it looks like

ご注文前に実物をご覧いただく機会がないため、実際の画面をそのまま掲載します。以下はサンプルの注文で、実在のご注文ではありません。Nobody has seen one of these before they order, so here is the real thing. The examples below are a sample order, not anyone's.

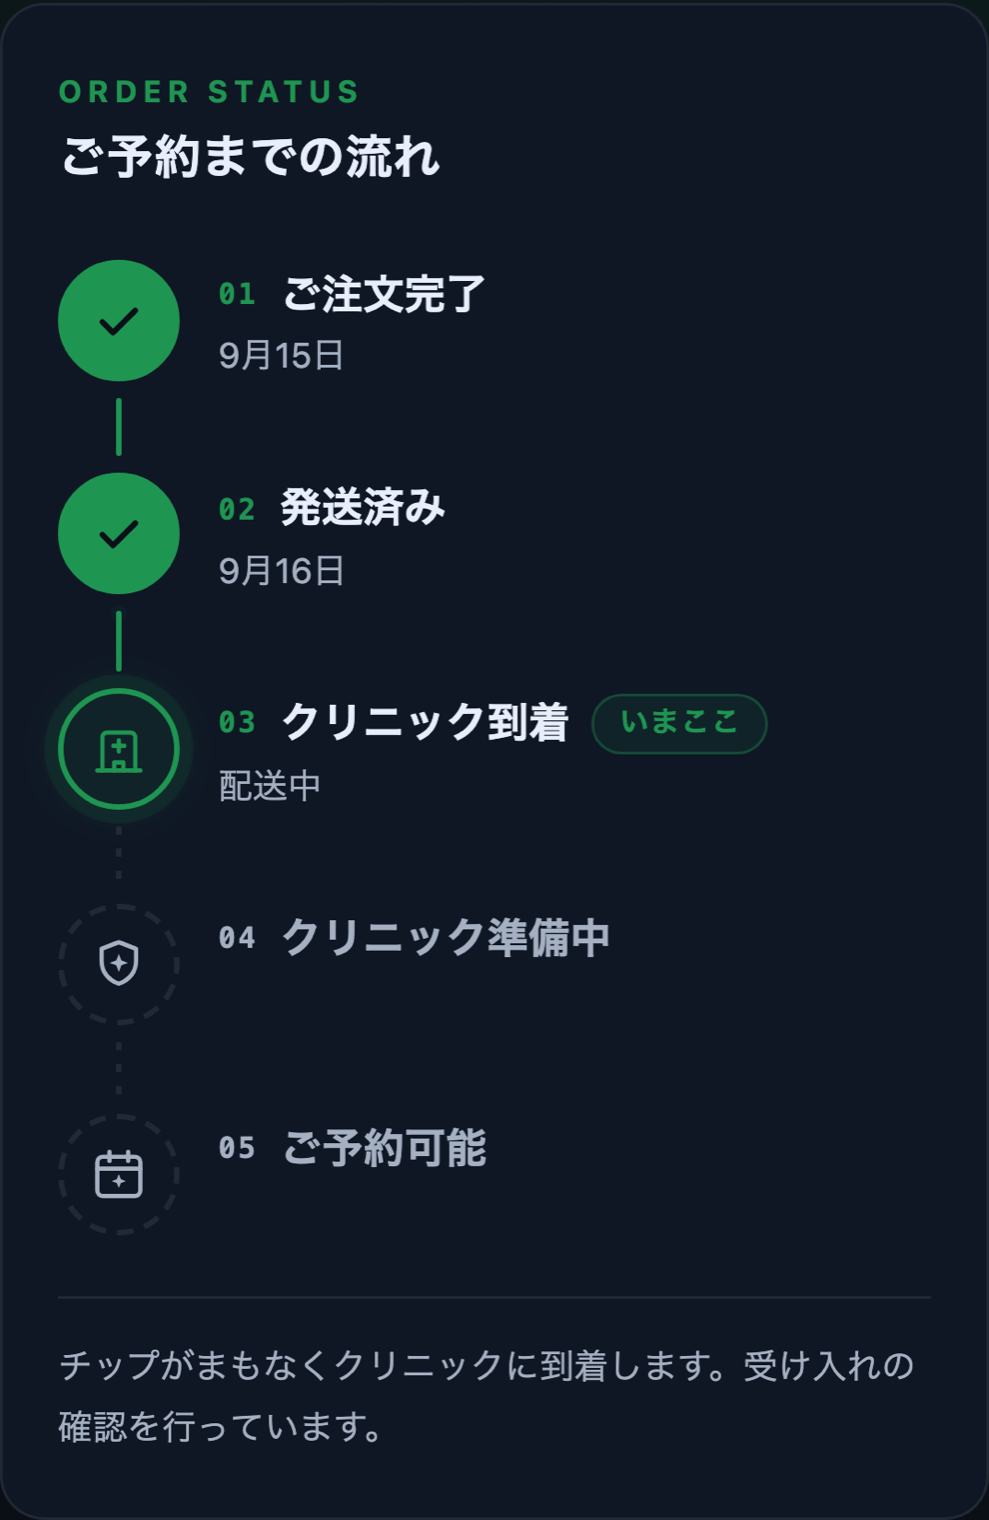
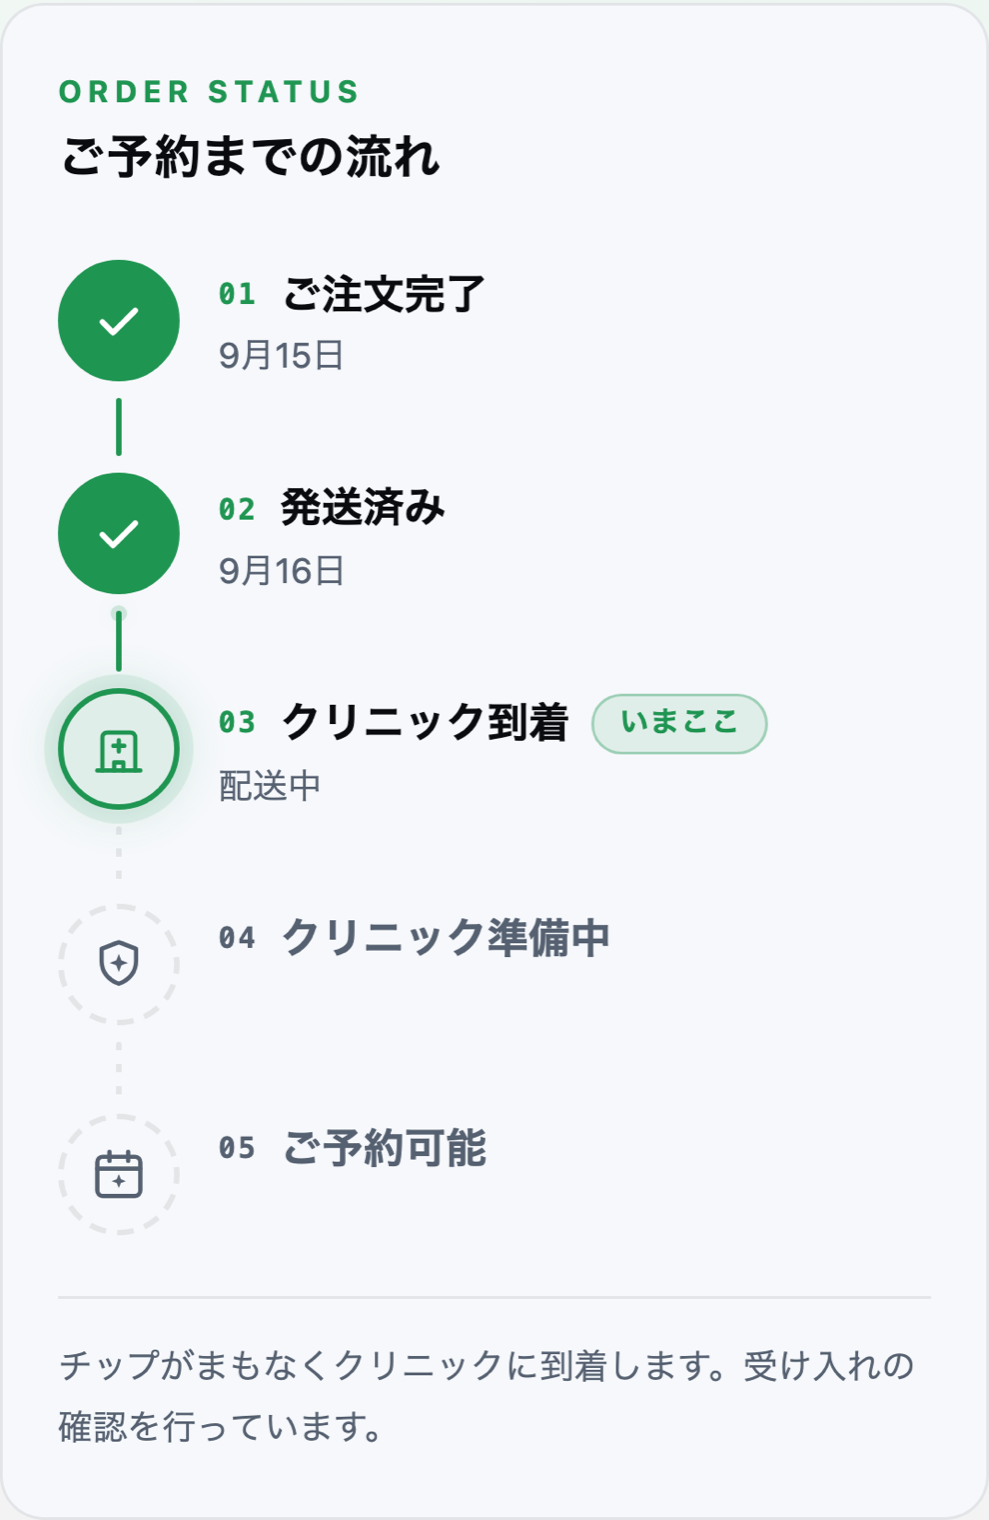
サンプルのバウチャー進捗。チップが提携医師のもとへ配送中の状態
ご注文から予約までの流れYour order, from purchase to bookingバウチャーには、お客様のインプラントが今どこにあるかが表示されます。注文の進行に合わせて進み、提携医師の情報は最初から確認できます。この例は、チップが提携医師のもとへ配送されている段階です。The voucher shows where your implant actually is. It fills in as the order moves, and your partner physician's details appear on it from the start. This example is at the point where the chip is on its way to the partner physician.
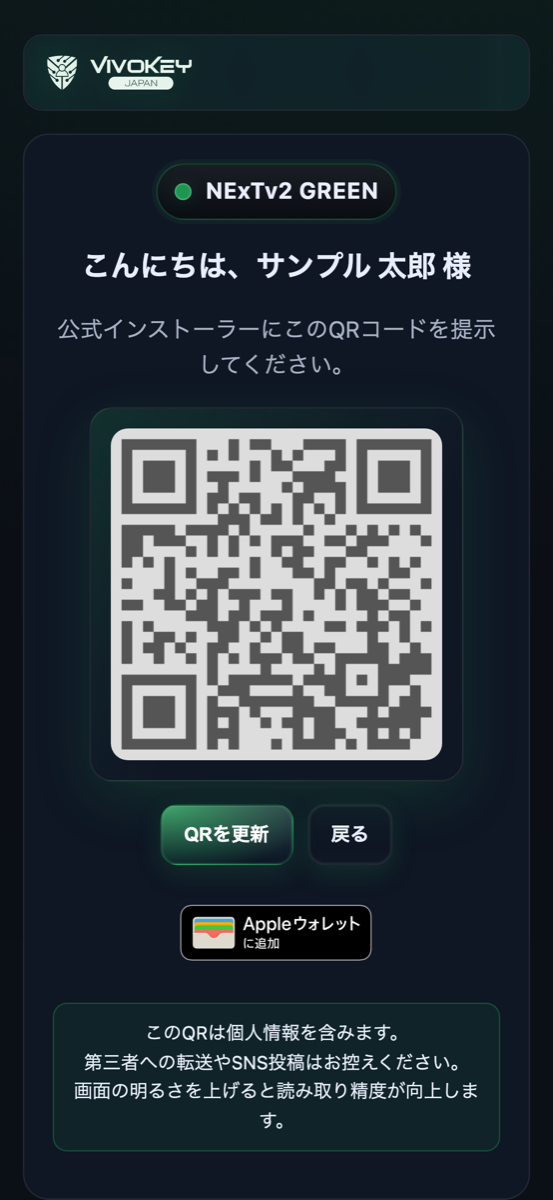
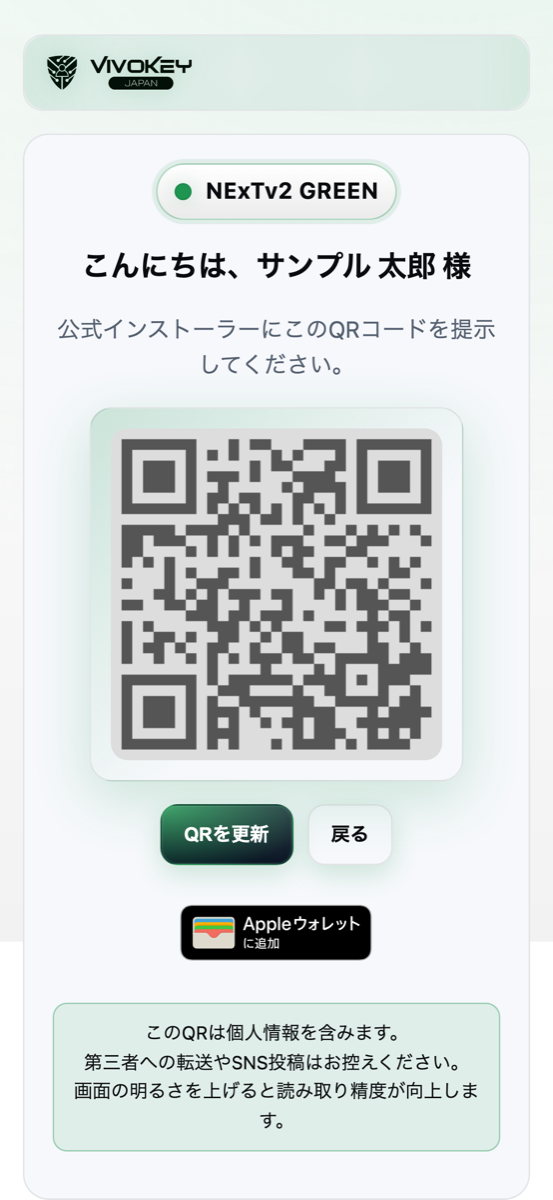
サンプルのバウチャーQR画面。注文した製品の色で表示されます
インストール当日に提示する画面The code you show on the day当日はこの画面をご提示ください。医師が読み取って確認は完了です。ご注文いただいたインプラントのLEDの色に合わせて表示され、iPhoneのSafariからはApple ウォレットに保存することもできます。On the day, you show this screen. The physician scans it and that is the whole check-in. It colors itself to the implant you ordered, and on an iPhone in Safari it can be saved to Apple Wallet.

お支払い後の流れAFTER YOU PAY

ご入金を確認したあとは、多くが自動で進みます。何が届き、どこを見て、お客様に何が残るのかをまとめました。Once your payment is confirmed, most of this happens on its own. Here is what arrives, where to look, and what is left for you to do.

公式LINEにリンクが届くThe link arrives on LINE

インストールバウチャーの発行リンクは、お客様のご入金を確認後、24時間以内に公式LINEでお客様へお送りします。The installation voucher link is sent by official LINE within 24 hours of payment confirmation.

  • その後、提携医師の確認が済むと、公式LINEから自動でお知らせが届きます。ご自身で確認し続けていただく必要はありません。When your partner physician confirms, LINE messages you again on its own; you do not have to keep checking.
  • 届かない場合は、同じ公式LINEへご連絡ください。If nothing has arrived, message us on the same account.

ご注文専用のバウチャーページYour own voucher page

リンクを開くと、上でご覧いただいたページが、お客様のご注文専用として表示されます。注文の進行に合わせて表示が進むため、インプラントが今どこにあるかを確認できます。The link opens the page shown above, issued for your order alone. It fills in as the order moves, so you can see where your implant actually is.

  • ご予約の際は、このページに記載の提携医師の連絡先をお使いください。This is where your partner physician's contact is when it is time to book.
  • ページのURLとQRコードは大切に保管してください。Keep the page URL and the QR code safe.

Apple ウォレットに追加するAdd it to Apple Wallet

バウチャーページには「Apple ウォレットに追加」のボタンがあり、ご注文いただいたインプラントの色に合わせたパスが作られます。The voucher page offers an Add to Apple Wallet badge, and the pass it makes is colored to the implant you ordered.

  • このボタンは、AppleデバイスのSafariでのみ表示されます。The badge appears only on an Apple device in Safari.
  • LINEのアプリ内ブラウザで開いた場合は表示されません。パスをご希望の場合は、Safariでページを開いてください。Opened inside the LINE browser it is not shown, so open the page in Safari if you want the pass.

ウォレットに入ったパスThe pass in your Wallet

保存したパスは、インプラントの色でウォレットに並びます。公式LINEのメッセージを探し直さなくても、バウチャーを開けます。Saved, the pass sits in Wallet in your implant's color, so the voucher is there without going back through LINE.

  • Androidやその他のブラウザをお使いの場合は、公式LINEのメッセージからバウチャーを開いてください。ページの内容は同じです。On Android or another browser, open the voucher from the LINE message; the page itself is the same.

本体が提携医師のもとへ届くまでHow the implant reaches your physician

  • 本体は提携医師のもとへ直送され、お客様の手元には届きません。当日、提携医師がそのままインストールに使用します。The implant ships to your partner physician, never to you. Your physician opens it on the day and uses it for your installation.
  • VivoKey Japanがお客様のお支払いを確認後、通常24時間以内に発送(郵便ポストへの投函)いたします。その後の集荷・配達の時期は日本郵便の運行によります。VivoKey Japan usually dispatches within 24 hours of confirming the customer's payment (the parcel goes into a Japan Post box). Pickup and delivery after that follow Japan Post's schedule.

ご予約は、バウチャーに記載の連絡先へお客様ご自身でお願いします。当日はバウチャーと身分証をお持ちください。インストール後の経過は治癒の目安をご覧ください。製品・バウチャー・発送に関するお問い合わせは公式LINEへ、お体や手順、アフターケアについてはバウチャーに記載の提携医師へお願いします(役割分担)。Booking is yours to make, with the contact on your voucher. Bring the voucher and your ID on the day, and the healing section shows what the weeks after look like. Product, voucher and shipping questions come to VivoKey Japan on the official LINE account; your body, the procedure and the aftercare belong to the partner physician on your voucher (who does what).

当日の持ち物ON THE DAY

提携医師の詳細PARTNER PHYSICIANS →
  • ご注文時に発行されたインストールバウチャーを持参するBring the installation voucher issued for your order
  • 公的身分証を持参するBring government-issued identification
  • 提携医師からの事前案内を確認するFollow any pre-visit instructions from your physician
  • インストール後の軽い腫れと、治るまでの期間を見込んでおくPlan for light swelling, tenderness and healing time after installation

治癒の目安HEALING

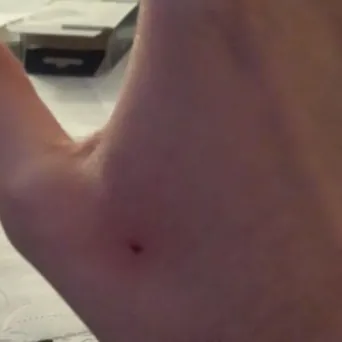
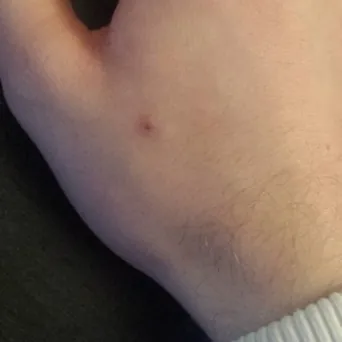
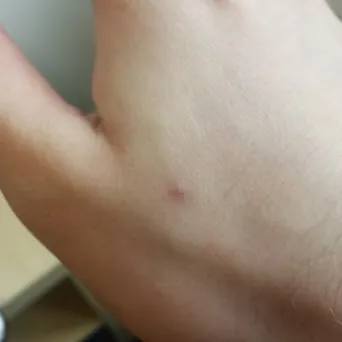
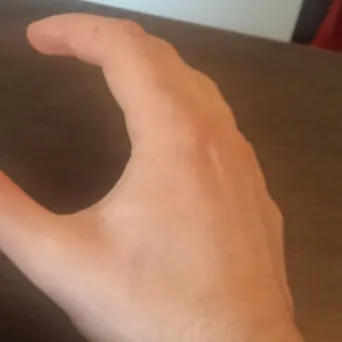
下の4枚は、実際のインストール後の経過写真です。説明は、これまでの経験とお客様の声をもとにした目安です。治り方には個人差があるため、参考としてご覧ください。The four photos show an actual healing course. The notes are a guide drawn from our experience and customer feedback. Healing varies from person to person, so yours may look different.

Healing course, day 0: the site right after installation
DAY 0

インストール直後Right after installation

傷の大きさは約2.5mm。少量の出血が起こることがありますが、5〜30分ほどで止まります。数日は軽い痛み、あざ、腫れが出ることがあります。腫れている間はインプラントが読み取りにくくなりますが、腫れが引けば元に戻ります。The entry point is roughly 2.5 mm. A little bleeding can occur and usually stops within 5 to 30 minutes. Light pain, bruising and swelling can appear over the following days. While the area is swollen the implant can be harder to read; it reads normally again once the swelling settles.

Healing course, the next day: a scab has formed
+1D

かさぶたができるA scab forms

かさぶたができ、傷が塞がり始めます。数日で腫れは引き、痛みやしびれも軽くなります。皮膚の内側はまだ敏感なので、インストール箇所を触ったり圧をかけたりしないでください。A scab forms and the wound begins to close. Over a few days the swelling fades and any pain or numbness lessens. The skin underneath is still sensitive, so avoid touching or pressing on the site.

Healing course, 3 to 5 weeks: only a small mark remains
+3-5W

かさぶたが取れるThe scab comes off

かさぶたが取れて、約1mmの小さな跡だけが残ります。腫れも引き、異物感はほとんどなくなります。The scab comes off and only a small mark, around 1 mm, remains. The swelling is gone and the sense of something being there has mostly faded.

Healing course, 6 to 8 weeks: the mark is almost invisible
+6-8W

跡がほとんど消えるAlmost invisible

跡はほとんど見えなくなります。1〜2年は、瞬間的にうずくような痛み、つままれるような感覚、軽いかゆみが起こることがありますが、多くは自然に治まります。The mark is almost invisible. For the next 1 to 2 years, a brief twinge, a pinching feeling or light itching can still occur at the site now and then. These usually pass on their own.

治癒には個人差があります。時期や感じ方は人によって異なります。気になる症状があれば、担当医師のアフターケア案内に従ってください。Healing varies by individual; your timing and sensations may differ. For anything that feels unusual, follow your physician's aftercare guidance.

固定されるまでの注意Until it is fixed in place

インストール後2週間から1ヶ月ほどで、インプラントの周りにコラーゲン組織のカプセルができて固定されます。それまでの間は皮膚の下でわずかに動くことがあります。骨の近くに移動した状態で強い衝撃を受けると、硬いガラスが骨に当たって割れる可能性はゼロではありません。これまでにそうした事例はありませんが、固定されるまでは念のため下記の点にご注意ください。なお、インストールの際に近くの小さな血管に触れることがあり、その場合は数時間ほど皮膚が青みを帯びますが、自然に治まります。About 2 weeks to 1 month after installation, a collagen capsule forms around the implant and holds it in place. Until then it can shift slightly under the skin. If it settled next to bone and took a hard knock, the glass could break against the bone: that possibility is not zero. We have had no such reports, but please take care with the following while it settles. During the installation a small vein near the site is sometimes affected, which can leave the skin slightly blue for a few hours afterward; this settles on its own.

  • 激しい運動は避けてください。Avoid strenuous exercise.
  • インストール箇所に圧力をかけないでください。Do not put pressure on the site.
  • インストール箇所を触ったり、つついたりしないでください。Do not touch, poke or fidget with the site.
  • 温泉やサウナは避けてください。Avoid onsen and sauna.
  • ロッククライミングや射撃など、強く握る動作は避けてください。Avoid strong-gripping activities such as rock climbing or shooting.
  • ポケットに手を入れるときや手袋をつけるときは、インストール箇所周辺の皮膚を引っ張らないよう注意してください。When putting a hand in a pocket or a glove, take care not to drag the skin around the site.

手を洗うときやシャワーを浴びるときは防水タイプのドレッシング材を、それ以外のときは通気性のよいものを使うと感染のリスクを下げられます。傷が完全にふさがったら、ドレッシング材は不要です。Use a waterproof dressing when washing your hands or showering, and a breathable one the rest of the time, to lower infection risk. Once the wound has fully closed, a dressing is no longer needed.

これは一般的な目安です。担当医師からの説明が優先されます。This is general guidance; your physician's own instructions always come first.

役割分担WHO DOES WHAT

VivoKey JapanVivoKey Japan

製品案内、用途の整理、本体代金の確認、インストールバウチャーの発行、提携医師への発送を担当します。Explains the products, confirms the fit, takes payment for the implant, issues the installation voucher, and sends the implant to your partner physician.

  • 製品と用途の案内Product and use-case guidance
  • 入金確認後のバウチャー発行Voucher issued once payment is confirmed
  • 提携医師との連携とお客様サポートCoordination with partner physicians, and customer support

提携医師Partner physician

当日の本人確認とバウチャー確認、インストール、アフターケアの説明を担当します。インストール料は各提携医師が設定し、当日、提携医師へ直接お支払いいただきます。当社は一切受け取りません。Checks your ID and voucher on the day, installs the implant, and explains the aftercare. The installation fee is set by each partner physician and paid to them directly on the day. VivoKey Japan receives no part of it.

  • インストールと医療上の判断Installation and medical judgment
  • 身分証とバウチャーの確認ID and voucher check
  • アフターケアとインストール料Aftercare and the installation fee

お客様You

製品を選び、バウチャー発行後に提携医師へ予約し、当日は公的身分証を持参。インストール後は医師のアフターケア案内に従います。Choose the product, book with your partner physician once the voucher is issued, bring a government ID on the day, and follow your physician's aftercare instructions.

  • 用途を先に整理Decide what you want it for first
  • バウチャー発行後のご予約Book after the voucher is issued
  • アフターケア案内の確認Follow the aftercare guidance